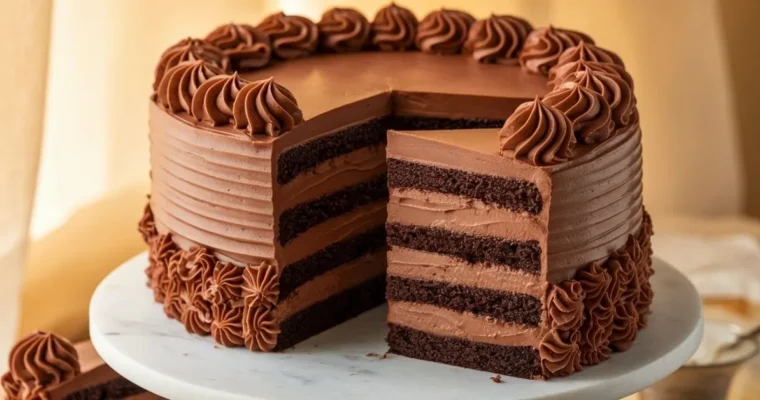
Matilda-Inspired Chocolate Cake
Indulge in this rich, fudgy Matilda-Inspired Chocolate Cake with moist layers and creamy frosting—just like the one from the beloved movie!
Indulge in this rich, fudgy Matilda-Inspired Chocolate Cake with moist layers and creamy frosting—just like the one from the beloved movie!
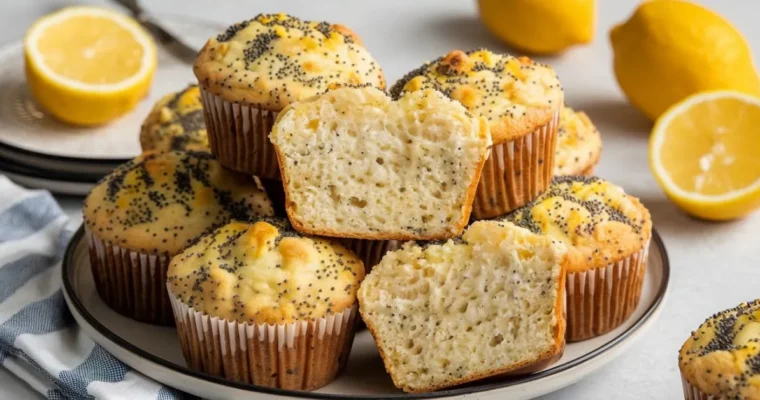
Enjoy soft, protein-packed Lemon Poppy Seed Cottage Cheese Muffins with a bright citrus flavor. Perfect for breakfast or a healthy snack!

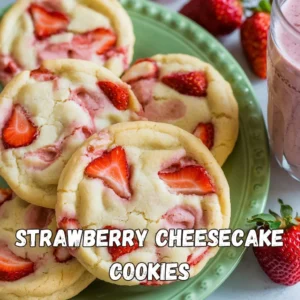
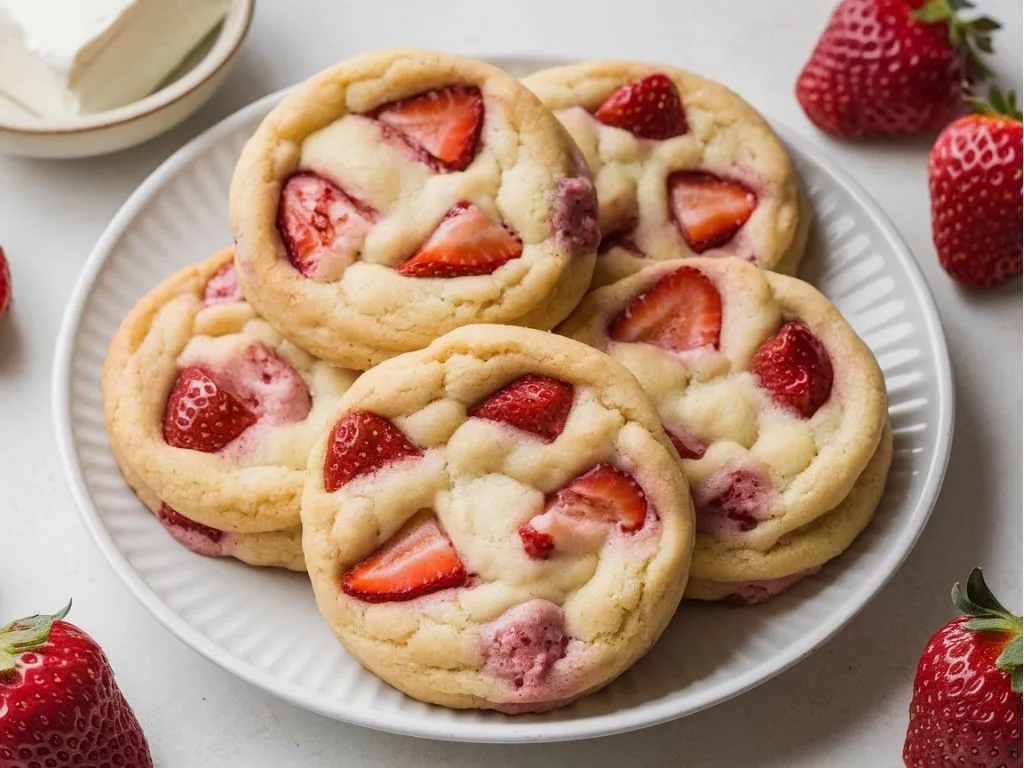
Ever tried making cheesecake, only to end up with a cracked top or a soggy mess? I’ve been there! That’s why these Strawberry Cheesecake Cookies are a game-changer—soft, chewy, and bursting with creamy cheesecake flavor, all wrapped in a buttery cookie. With real strawberries and a luscious cream cheese filling, they deliver all the indulgence of a classic cheesecake without the hassle of a water bath or long chill times!
Imagine the delightful fusion of a classic cheesecake and a soft, chewy cookie—these Strawberry Cheesecake Cookies bring that vision to life. Here’s what makes them an irresistible favorite:
Embrace the joy of baking and savoring these delectable Strawberry Cheesecake Cookies, where the classic dessert meets handheld convenience.
Before we dive into baking, let’s gather all the essentials to ensure a seamless and enjoyable experience. Here’s what you’ll need:
For the Cookies:
For the Cheesecake Filling:
Follow these simple steps to create soft, creamy, and delicious strawberry cheesecake cookies:
1. Mix the Dough
2. Prepare the Cheesecake Filling
3. Shape and Fill the Cookies
4. Bake the Cookies
5. Serving & Storage
By incorporating these tips and variations, you can customize your strawberry cheesecake cookies to suit your taste and impress your guests with bakery-quality results
1. Can I skip the chilling step?
Yes, you can bake the cookies immediately without chilling the dough. However, skipping this step may cause the cookies to spread more during baking and result in a less chewy texture. Chilling the dough helps maintain the cookies’ shape and enhances their chewiness.
2. How to store these strawberry cheesecake cookies?
To maintain their freshness, place the cookies in an airtight container and refrigerate them. This storage method helps preserve their texture and flavor.
3. Can I bake these cookies ahead of time?
It’s best to prepare the cookie dough and cheesecake filling in advance, storing them separately in the refrigerator. When ready to serve, bake the cookies, allow them to cool, and then assemble with the filling. This approach ensures optimal texture and taste.
4. What kind of cream cheese should I use?
Use full-fat cream cheese. Ensure it’s softened to room temperature before mixing to achieve a smooth, lump-free consistency.
5. Why are my cookies so soft?
Overmixing the dough or using overly ripe strawberries can introduce excess moisture, leading to softer cookies. To achieve a firmer texture, mix the dough just until combined and use fresh, firm strawberries.
5. Can I use frozen strawberries?
While fresh strawberries are preferred for their flavor and texture, you can use frozen strawberries if needed. If using frozen strawberries, do not thaw them before baking, and chop them finely to prevent excess moisture in the dough.
Baking these Strawberry Cheesecake Cookies is more than just preparing a dessert; it’s an opportunity to infuse your kitchen with the comforting aroma of homemade treats and to share joy with loved ones. Remember, the best results come from using fresh ingredients and adding your unique touch. Happy baking!
If you enjoyed this recipe, be sure to check out our other cookies creations that cater to a variety of tastes and occasions. From classic favorites to innovative twists, there’s something for every sweet tooth.
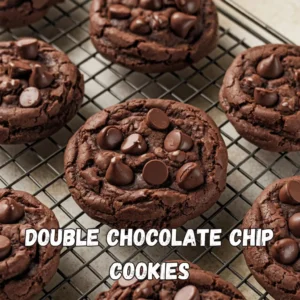
S’mores Chocolate Chip Cookies

Experience the delightful fusion of rich chocolate cake and creamy frosting in these irresistible cookies and cream cupcakes.
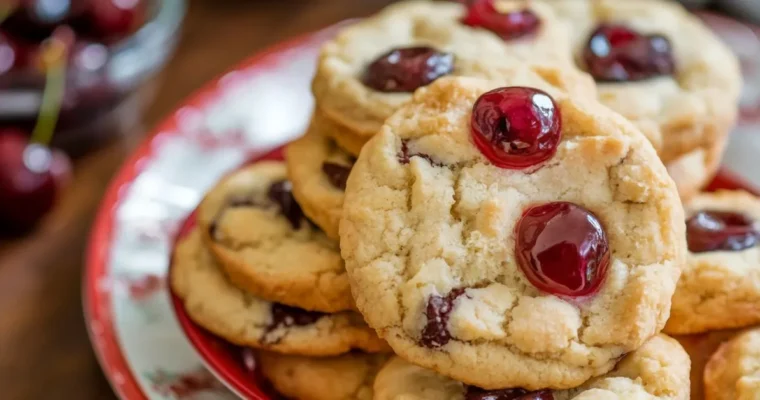
Make irresistible Cherry Red Dot Cookies—soft, buttery, and topped with sweet cherries. Perfect for holidays or a quick treat!
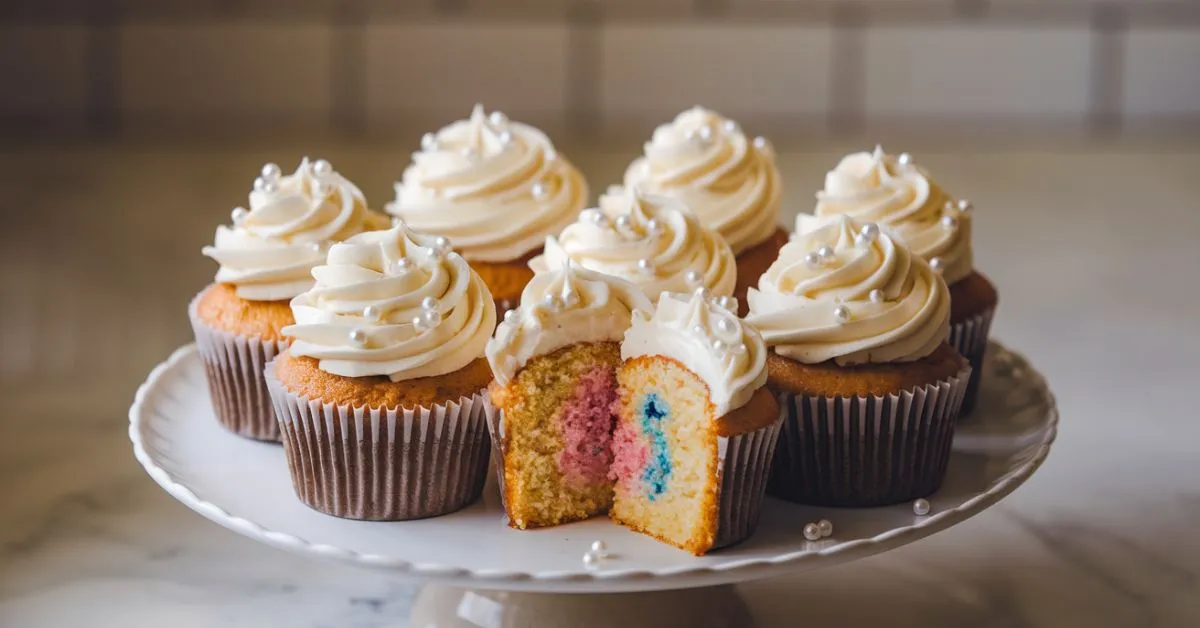
There’s nothing more exciting than a sweet surprise, and these Gender Reveal Cupcakes are the perfect way to share the big news! With a light, fluffy vanilla cupcake and a hidden pink or blue filling, they create a fun and memorable moment for family and friends. Whether you’re planning a small gathering or a grand celebration, these cupcakes are easy to make and can be customized with your favorite colors and decorations. Get ready to bake a batch of joy and reveal the big surprise in the most delicious way!
These Gender Reveal Cupcakes are more than just a dessert—they’re a fun and delicious way to share an unforgettable moment with loved ones. Here’s why they’re a must-bake for your special announcement:
With everything ready, you’re all set to bake delicious Gender Reveal Cupcakes that will make your celebration extra special!

Gender reveal cupcakes are more than just a sweet treat—they add a touch of excitement and joy to your special announcement. With their soft, fluffy texture and surprise-filled center, they’re a fun and delicious way to share the big news with family and friends. Whether you choose classic vanilla, rich chocolate, or a unique flavor twist, these cupcakes are sure to create unforgettable memories.
Try this recipe for your next gender reveal party and watch the smiles as everyone takes their first bite!
1. Can I make gender reveal cupcakes in advance?
Yes! You can bake the cupcakes a day or two ahead and store them in an airtight container at room temperature. If you’re adding frosting, refrigerate them and bring them to room temperature before serving.
2. How do I get vibrant blue or pink filling?
Use gel food coloring instead of liquid for a more intense color without altering the consistency of the filling.
3. Can I use a cake mix instead of making cupcakes from scratch?
Absolutely! A boxed cake mix works great if you’re short on time. Just follow the package instructions and add a homemade touch with your favorite frosting.
4. What’s the best way to fill the cupcakes?
After baking, use a piping tip, apple corer, or small knife to remove a portion from the center of each cupcake. Then, fill with colored frosting, jam, or custard before replacing the cupcake top.
5. Can I freeze gender reveal cupcakes?
Yes, unfrosted cupcakes can be frozen for up to two months. Wrap them tightly and thaw at room temperature before adding the filling and frosting.
6. What frosting works best for gender reveal cupcakes?
Buttercream is a classic choice, but cream cheese frosting or whipped frosting also pair beautifully with these cupcakes. Just make sure it’s firm enough to hold any decorations.
7. How can I make the reveal extra fun?
Consider adding sprinkles or colored candies inside for a surprise burst when bitten into. You can also top the cupcakes with question mark decorations to build anticipation.
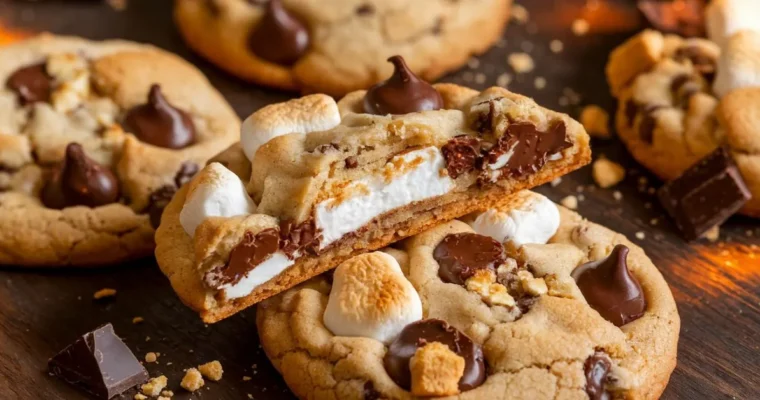
Soft and chewy S’mores Chocolate Chip Cookies packed with gooey marshmallows, chocolate, and graham crackers for the ultimate nostalgic treat!

Soft and chewy, these Oatmeal Chocolate Chip Cookies are loaded with rich chocolate and oats, delivering the perfect balance of texture and flavor!
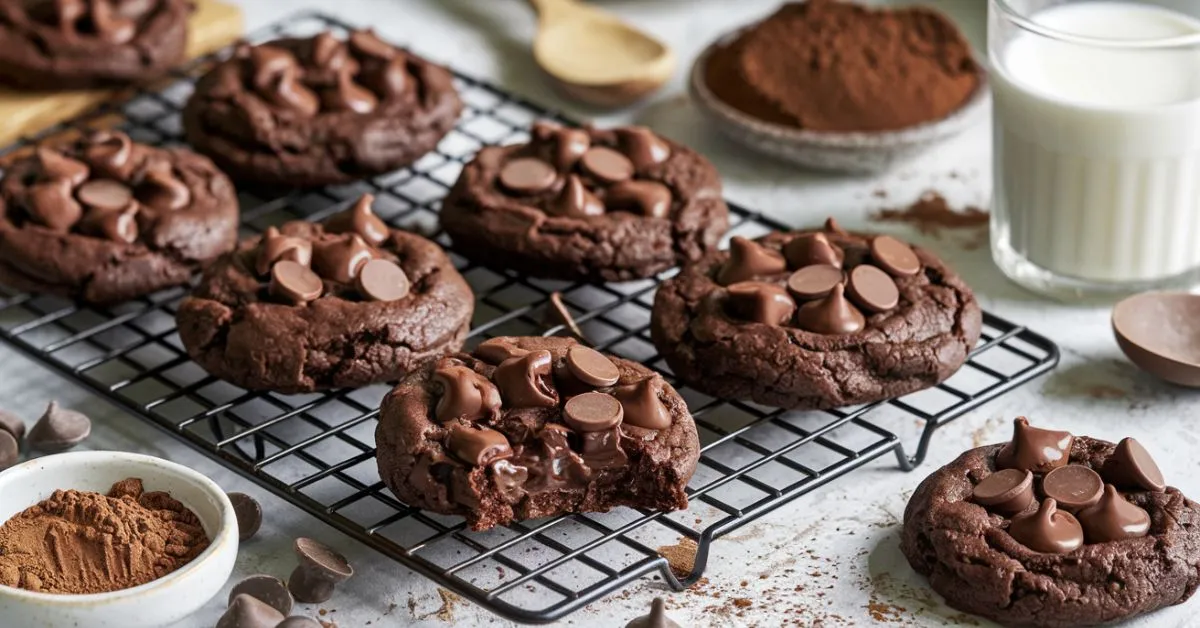
There’s something magical about double chocolate chip cookies—rich, indulgent, and irresistibly gooey. If you’re a chocolate lover, this recipe is about to become your new favorite. Picture sinking your teeth into a soft, chewy cookie packed with melty chocolate chips and a burst of cocoa goodness. These cookies are perfect for any occasion, whether you’re treating yourself to a sweet snack or impressing guests with a homemade dessert. With just a few simple ingredients, you’ll have warm, melt-in-your-mouth cookies in no time. Ready to dive into the world of double chocolate bliss? Let’s get baking!
Double chocolate chip cookies are the ultimate indulgence for chocolate lovers. What makes them so special? Let’s break it down:
Once you have everything on hand, you’re ready to bake! These ingredients will come together to make a dough that’s perfectly balanced between rich chocolate, sweetness, and a chewy texture.
Making your own Double Chocolate Chip Cookies is a fun and rewarding process. Here’s a detailed breakdown to guide you through each step, ensuring perfect cookies every time.


Double Chocolate Chip Cookies are wonderfully versatile, and there are plenty of ways to get creative with this recipe. Whether you’re a chocolate lover or looking to add your own twist, here are a few pro tips and fun variations to try!
These Double Chocolate Chip Cookies are everything you could ever want in a dessert—rich, decadent, and irresistible! Whether you’re baking for yourself, friends, or family, these cookies will always deliver a sweet, indulgent experience that everyone will enjoy.
With the perfect balance of smooth chocolate chips, a slightly chewy texture, and a subtle cocoa flavor, these cookies are truly the best of both worlds. They’re quick and easy to prepare, making them an ideal option for both beginner bakers and seasoned pros. And, with all the variations and tips we’ve covered, you can customize them to suit your personal taste!
The next time you’re craving a chocolatey treat, these cookies are the answer. And don’t forget, they also make fantastic gifts, especially when paired with a cute packaging or a homemade tag!
Enjoy every bite, and happy baking!
1. Can I swap milk chocolate chips for another type of chocolate?
Yes! You can definitely use semi-sweet or dark chocolate chips if you prefer a less sweet or more intense chocolate flavor. The choice is yours!
2. How can I keep my Double Chocolate Chip Cookies soft?
To ensure your cookies stay soft, don’t bake them for too long. They should look slightly underdone when you take them out; they’ll continue to set as they cool. Additionally, you can add a little extra brown sugar to keep them moist.
3. Can I prepare the dough in advance?
Yes, you can make the dough up to three days ahead and store it in the fridge. This actually helps the flavors develop even more, making them even tastier when you bake them later.
4. How do I avoid my cookies spreading too much during baking?
If you’re concerned about your cookies spreading too much, chilling the dough for at least 30 minutes before baking will help. This ensures the dough is firm enough to hold its shape while baking.
5. Can I make these cookies gluten-free?
Yes, you can! Using a gluten-free flour blend works well for this recipe. Be sure to check if you need to add a binder, such as xanthan gum, to help with texture.
6. Why did my cookies come out flat?
Flat cookies can result from over-softened butter or insufficient flour. Make sure to measure your ingredients accurately, and try using chilled dough if you want thicker cookies.

These Peanut Butter Chocolate Chip Cookies are soft, chewy, and packed with flavor. The perfect treat for any peanut butter and chocolate lover!