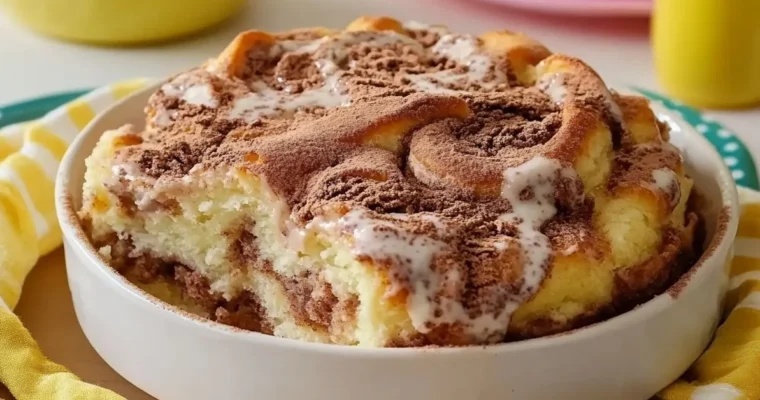
Cinnamon Roll Dump Cake – Your New Favorite Easy Dessert
Cinnamon Roll Dump Cake is a gooey mix of cinnamon rolls, cream cheese, and a buttery topping—easy to make and irresistibly delicious!
Cinnamon Roll Dump Cake is a gooey mix of cinnamon rolls, cream cheese, and a buttery topping—easy to make and irresistibly delicious!
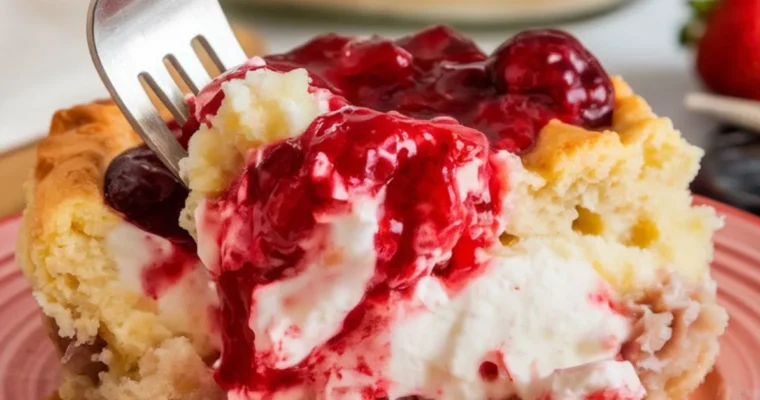
This Strawberry Cheesecake Dump Cake is rich and creamy, with sweet strawberries, a luscious cream cheese filling, and a golden, buttery cake topping!
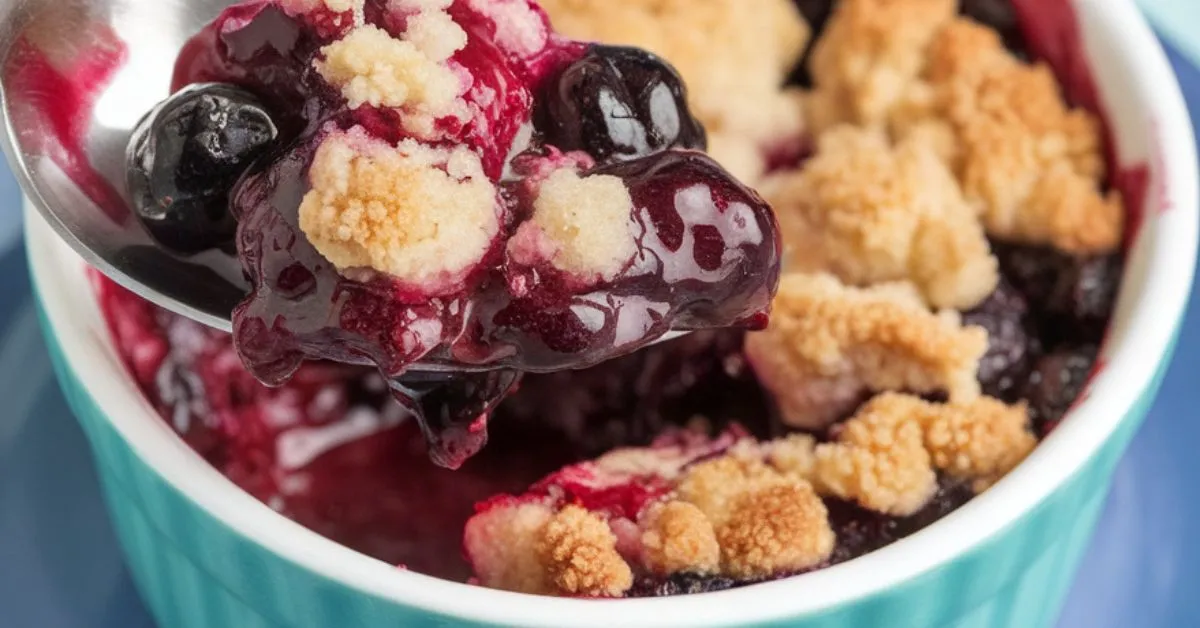
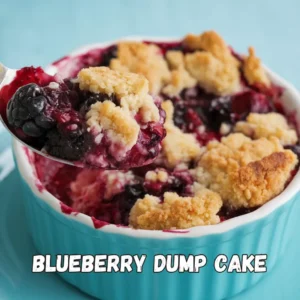
If you’re looking for an easy, crowd-pleasing dessert that’s full of flavor, this Blueberry Dump Cake is your answer! Perfectly sweet and fruit-filled, this simple cake comes together with minimal effort and makes for the ultimate comfort food. With just a few basic ingredients like blueberries, cake mix, and butter, you can have a delicious dessert that’s warm, fruity, and so satisfying. Whether you’re a baking pro or a beginner, this recipe is a breeze and will have everyone asking for seconds. Plus, it’s versatile—swap out the blueberries for your favorite fruit or mix in a few extra goodies for a fun twist. Ready to dive in? Let’s get baking!
This Blueberry Dump Cake recipe is the ultimate dessert for anyone looking for a quick, foolproof treat that delivers a mouthwatering flavor. Here’s why you’ll absolutely love it:
To make this Blueberry Dump Cake, you don’t need a long list of ingredients—just a few pantry staples and fresh blueberries. Here’s what you’ll need:
Making this delicious Blueberry Dump Cake is so simple and rewarding. Follow these easy steps, and you’ll have a crowd-pleasing dessert in no time:
When it comes to making your Blueberry Dump Cake even more delicious, these tips and variations will elevate the recipe. Let’s dive into some expert advice to help you achieve the perfect dessert every time.
With these simple tweaks and ideas, you can customize your Blueberry Dump Cake to suit your taste preferences and impress anyone who tries it. Whether you stick to the original recipe or get creative with different flavors and textures, this cake is sure to become a staple in your baking repertoire.
Once your Blueberry Dump Cake is ready, let’s explore the best ways to serve and store this delightful dessert for maximum enjoyment!
Blueberry Dump Cake is the ultimate comfort dessert that’s as easy to make as it is delicious. With its perfect balance of sweet and tart flavors, it’s a treat your whole family will love. Whether you’re preparing it for a weeknight dessert or serving it at a gathering, this simple yet scrumptious cake will always be a hit.
Enjoy this easy blueberry dessert, and remember—sometimes the simplest recipes make the most unforgettable memories. Happy baking!
1. Can frozen blueberries be used in this recipe?
Yes, frozen blueberries are a great option for this recipe. There’s no need to thaw them beforehand—simply add them straight to the dish. The extra juices they release will enhance the cake’s moist and fruity texture.
2. Is it possible to prepare Blueberry Dump Cake in advance?
Certainly! Assemble the ingredients in the baking dish, cover it, and refrigerate for up to 24 hours. When it’s time to serve, simply bake as directed for a freshly made dessert with minimal effort.
3. Can other fruits be added to the recipe?
Absolutely! This recipe is versatile, so you can add fruits like blackberries, cherries, or diced apples to create unique flavor combinations. It’s perfect for using up whatever fruit you have on hand.
4. How should leftovers be stored?
Store leftover Blueberry Dump Cake in an airtight container in the refrigerator. It stays fresh for up to 2 days and can be enjoyed cold or reheated for a warm treat.
5. Is freezing this cake an option?
Yes! Once the cake has cooled, wrap it securely and store it in the freezer for up to two months. To enjoy later, thaw it in the fridge overnight and warm it gently in the oven or microwave.
6. How can I achieve a crispier topping?
For a crunchy finish, bake the cake for a few extra minutes, watching closely to avoid overbaking. Alternatively, sprinkle a thin layer of sugar or crushed nuts over the cake mix before baking.

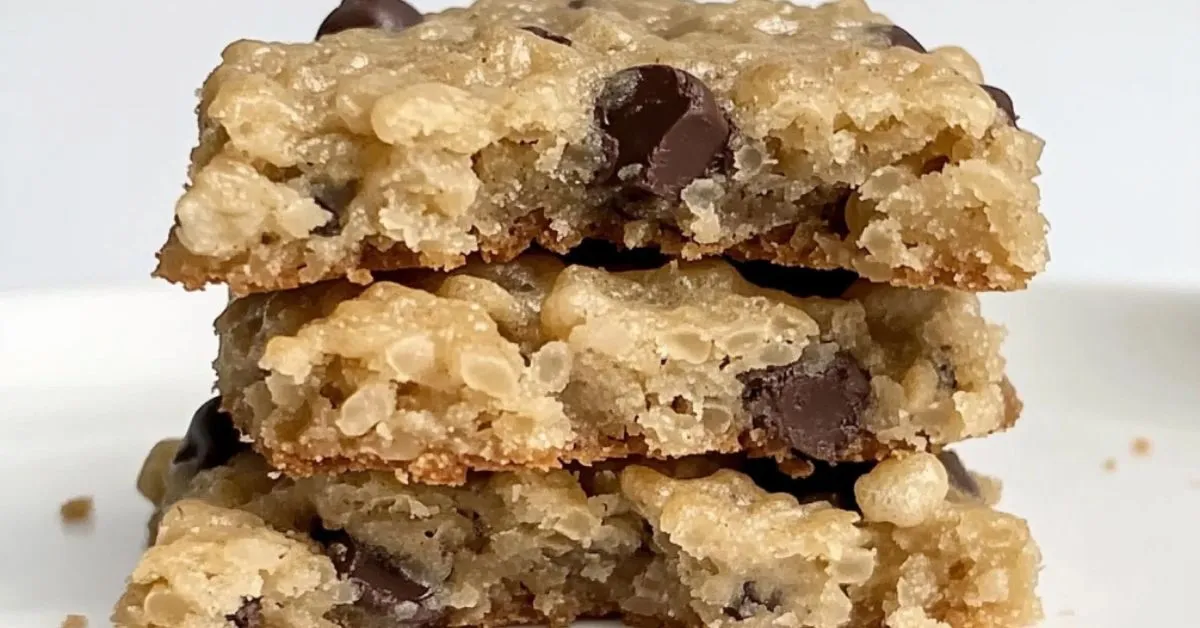
Enjoy gooey marshmallow chocolate chip cookies with melty chocolate and soft texture. Easy to make and irresistible!
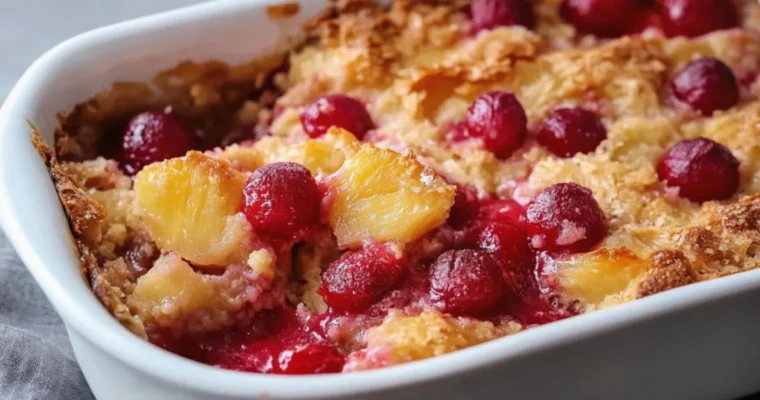
Make the best Cherry Pineapple Dump Cake with this easy recipe! Bursting with fruity flavors and a buttery crust, it’s a dessert everyone will love.
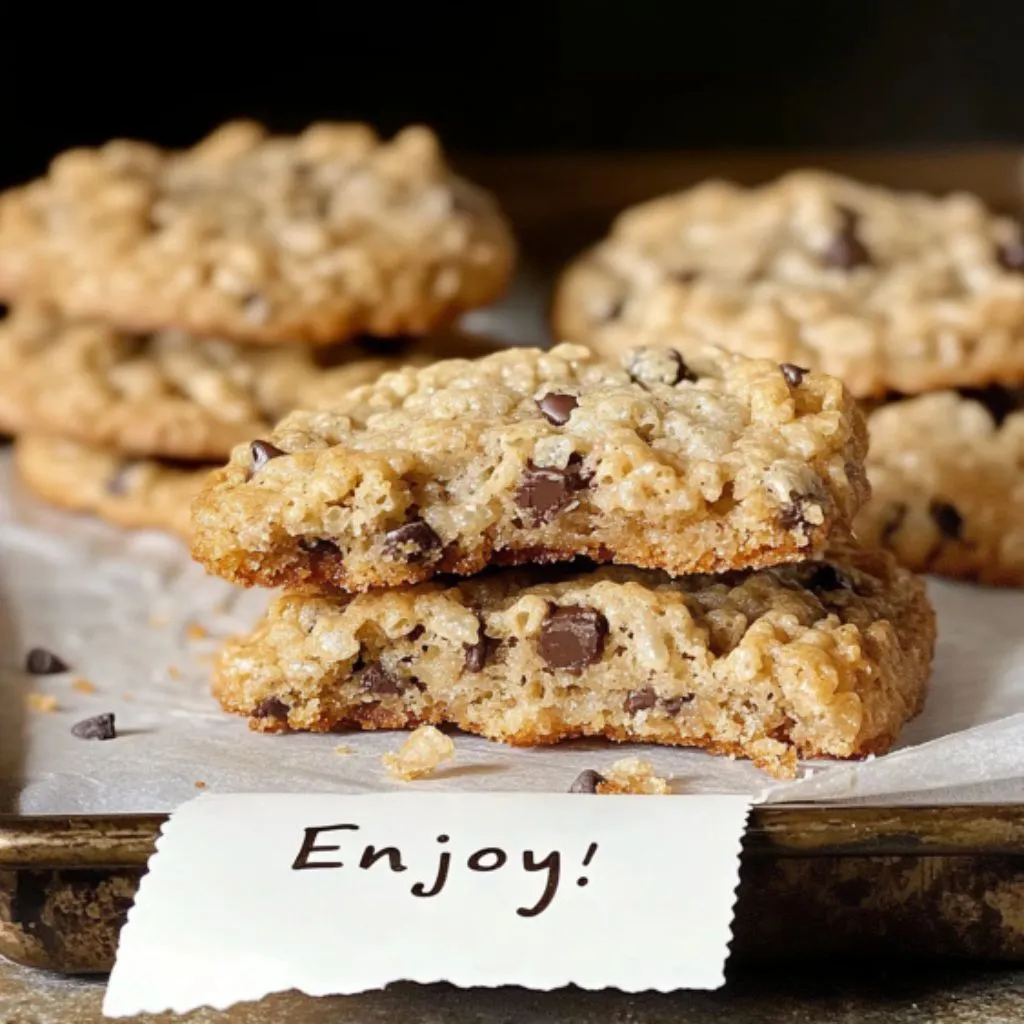
Imagine a cookie that combines the rich, buttery flavor of a classic chocolate chip cookie with the airy, irresistible crunch of Rice Krispies. Sound too good to be true? These Rice Krispie Chocolate Chip Cookies are the ultimate treat you didn’t know you needed! Whether you’re baking for a family gathering, a holiday party, or simply craving something sweet and satisfying, these cookies check all the boxes. They’re easy to whip up, fun to make with kids, and offer a delightful twist on the traditional cookie. Get ready to fall in love with this crunchy, chewy, chocolatey perfection!
Rice Krispie Chocolate Chip Cookies are the ultimate fusion of textures and flavors, combining the buttery, chewy goodness of traditional chocolate chip cookies with the light, crispy crunch of Rice Krispies. This unique twist creates a cookie that’s delightfully soft on the inside with just the right amount of crispiness in every bite.
What makes these cookies stand out is their versatility and appeal. Whether you’re a seasoned baker or a beginner, this recipe is easy to follow and guarantees delicious results. Perfect for holidays, parties, or an afternoon snack, these cookies are sure to become a family favorite.
Think of them as an elevated version of classic chocolate chip cookies—something both nostalgic and innovative. They’re a sweet treat you’ll love sharing (or maybe keeping all to yourself). Ready to bake your way to crunchy, gooey bliss? Let’s dive into why these cookies deserve a spot in your recipe collection!
Get ready to fall in love with a cookie that’s truly one of a kind! These Rice Krispie Chocolate Chip Cookies bring together the best of both worlds—classic comfort and a fun twist. Here’s why they’re a must-try:

Making Rice Krispie Chocolate Chip Cookies is already a simple, fun process, but a few pro tips can elevate your cookie game to the next level! Whether you’re looking for the perfect texture or want to explore creative variations, these tips will make your cookies even more irresistible.
These pro tips and fun variations give you the flexibility to experiment with flavors and textures. Whether you stick to the classic recipe or add your unique spin, you’re guaranteed to bake a batch of cookies that will have everyone asking for more!
After you’ve baked up a batch of Rice Krispie Chocolate Chip Cookies, it’s important to know how to serve and store them to keep them fresh and irresistible. Here are some great serving ideas and tips for storing them properly.
By following these easy serving and storage tips, you’ll be able to enjoy your Rice Krispie Chocolate Chip Cookies whenever the craving hits. Whether you’re sharing them at a party or savoring them by yourself, these cookies will always be a crowd-pleasing treat!
Rice Krispie Chocolate Chip Cookies are the perfect blend of chewy, crispy, and chocolatey goodness. With their unique texture and irresistible flavor, they’re great for any occasion—whether you’re sharing with friends or enjoying them on your own. Easy to make and customizable, these cookies are sure to become a staple in your baking routine. Enjoy them fresh, store for later, or even turn them into ice cream sandwiches! Either way, they’ll quickly become a favorite treat.

1. Can I use other cereals instead of Rice Krispies?
Absolutely! While Rice Krispies are a classic choice, you can swap them for other cereals like Cornflakes or even oats for a different texture. Keep in mind that this may slightly alter the crunchiness and flavor of the cookies, but it’s a fun way to customize your batch.
2. How can I get the perfect chewy texture?
To keep your Rice Krispie Chocolate Chip Cookies soft and chewy, don’t overbake them. Take them out of the oven when they are golden around the edges but still soft in the middle. They’ll firm up as they cool.
3. Can I add extras to these cookies, like nuts or candy?
Definitely! This recipe is versatile. You can toss in chopped nuts like walnuts, pecans, or almonds, or even add mini M&Ms or dried fruit for an extra pop of flavor. Just be sure to gently fold them into the dough to avoid crushing the Rice Krispies.
4. My cookies are spreading too much. Any tips?
If you find that your cookies are spreading too thin, try chilling the dough before baking. This helps the cookies hold their shape. Additionally, ensure you’re not using too much butter or oil in the dough, as this can cause excess spreading.

Discover the perfect Heart Jam Cookies recipe! Soft, buttery, and filled with sweet jam, these cookies are ideal for any occasion or gifting.

Bake the perfect chocolate chip cookies with this easy, soft, and chewy recipe. Ideal for any occasion, enjoy homemade treats everyone will love!
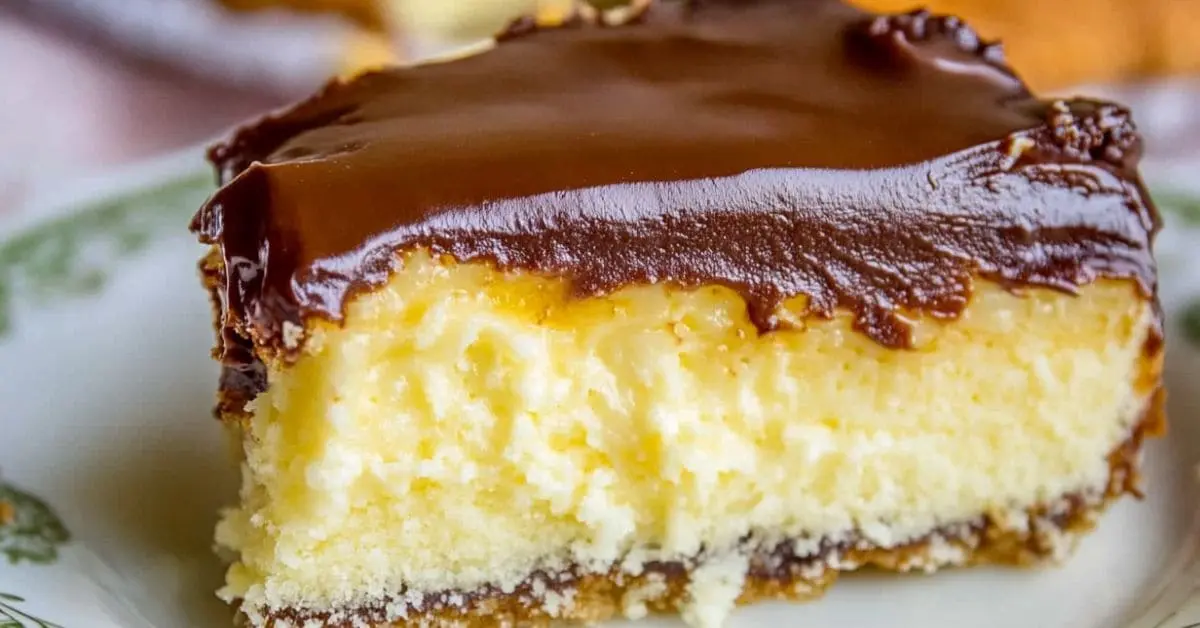
Have you ever craved the indulgent flavors of a Boston Cream Pie but wished for an easier way to enjoy it? Meet the Boston Cream Pie Poke Cake—a dessert that’s just as luxurious but wonderfully simple to make. This recipe combines the moistness of a classic yellow cake, the creaminess of velvety vanilla pudding, and the decadence of a rich chocolate glaze. Whether you’re hosting a celebration, need a quick potluck dessert, or just want to treat yourself, this poke cake is a surefire hit. Plus, it’s make-ahead friendly, so you can whip it up a day before and let the flavors meld to perfection. Let’s dive into the details of this irresistible creation!
If you’re wondering what makes this dessert so special, let’s break it down! A Boston Cream Pie Poke Cake is a delightful twist on the iconic Boston Cream Pie. Traditionally, Boston Cream Pie is a layered sponge cake filled with creamy custard and topped with a luscious chocolate glaze. This poke cake version keeps all those dreamy elements but makes the process much simpler.
Here’s how it works:
Why should this recipe be your next dessert project? Let’s count the ways:

1. Is it possible to prepare this cake in advance?
Absolutely! This cake is ideal for making ahead. Prepare it the day before and let it chill overnight for the best flavor and texture.
2. How should I store leftovers?
Cover the cake tightly with plastic wrap or foil and refrigerate. It will stay fresh for up to three days when stored properly.
3. Can I freeze this cake?
While the cake can be frozen, the pudding may not retain its creamy texture after thawing. If freezing, consider adding the pudding and topping fresh after defrosting.
4. What if I don’t have heavy cream for the topping?
You can substitute heavy cream with milk, but the glaze may be slightly less rich and creamy.
This Boston Cream Pie Poke Cake is everything you love about the classic dessert, made even easier and more irresistible. With its moist cake, creamy filling, and decadent chocolate topping, it’s a guaranteed hit for any occasion. Try it for your next gathering or simply to treat yourself—you deserve it!
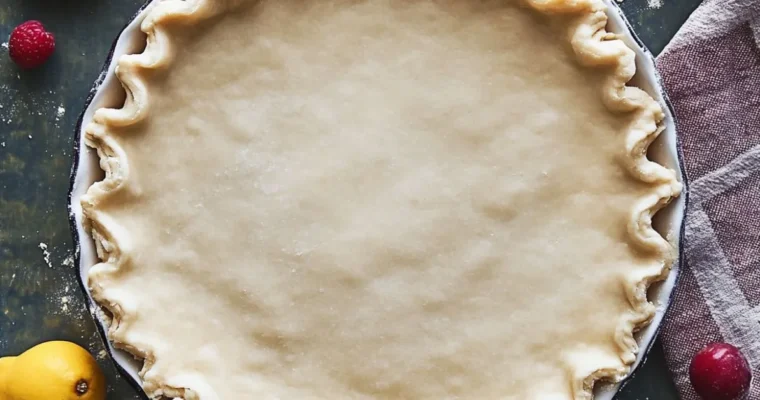
Discover the best pie crust recipe with shortening for a flaky and flavorful pie shell every time.